priming miniatures guide | The Right way to prime miniatures
Priming miniatures is the key to getting a display-quality paint job. While most painters prime their miniatures before painting, some don’t really know the simple basics around priming miniatures to professional quality.
In this guide, we will go over everything you need to know about priming miniatures, from why you should prime your models to how to apply primer and the best primers to use.
Why should you prime your miniatures before painting?
The main reason why anyone should prime their miniature is so the paint sticks better to the miniature, does not wear off fast, and for enhanced aesthetic appeal.
You don’t want to do all that work, paint a glorious piece, and start having it wear off the model, or worst off, flake as you use them. Paint can crack and wear over time due to hard use and the effects of UV rays.
Even though some people use their base paint as a substitute for primer, the fact some miniature hobbyists don’t keep in mind is that some paints are pretty translucent.
Only base coating with these paints, you may have to apply more than five coats to get the right coverage. Fortunately, primers often come in different color palates, making it easy to blend with the paint and cover well.
Priming is essential if you care about keeping your painted miniature looking good at all times. It gives your paint job more resilience, durability, smooth results, and excellent coverage.
What primer will be best for what type of miniature
Most primers are alcohol-based, while others are water-based.
Technically, both the water-based and the alcohol-soluble primers (i.e., Tamiya Surface Primer) will work well on any material, whether plastic resin or metal.
However, you may want to keep water-based primers off models you intend to use oil paints on because it really won’t offer any advantage on adherence.
The tools you need
To easily prime your models, you will need essential tools like
- a handle
- a paintbrush
- spray can or airbrush
- the primer
- a cleaning rag
Preparing your miniature for priming
So, you know the reasons why you should prime the miniature. But, how do you actually prime your miniatures? The first step is to prepare them.
Best way to prepare your miniatures for priming
- Remove mold lines
Mold lines often affect the fit accuracy, and the realism of your model. plus, they can leave your model looking poor-quality.
If you already have essential tools like a hobby knife, scalpel, or craft knife, you will be a step ahead when preparing your miniatures for priming. Before priming the model, get your hobby knife and carefully scrape off excess mold stripes on the miniature’s surface.
- Fill gaps
Nothing is perfect. It’s why on your miniature’s surface, you will sometimes see small gaps and holes that may distort its appearance. On the other hand, gaps occur when you mistakenly cut off excess mold lines from the miniature.
You really can’t prime without covering these gaps, especially if you plan to display them. An essential tool that helps you fill gaps is glue.
Read our guide on “Best glue for Warhammer and DnD Miniatures” to find the right gap filler for your Warhammer models.
- Sand the miniature
After using glue, your miniature kit may spot small bumps, especially if you add excess glue. Plus, the part holding the mold lines may not really look smooth like the untouched surfaces.
To remedy this and get an even, smooth surface, sand the model using essential tools like a sanding stick or fine-grit sandpaper. They both come in different sizes to fit into the hidden corners of the model.
The last step before priming your miniature is to wash the model. During the production of miniatures and models mold release is used. Mold release makes it impossible for your paint to adhere.
Washing the model helps remove the mold release agent that may persist on the kit after production. In a bowl, pour some water and soap. Then, wash the model thoroughly. People also use toothbrushes for the best results; you can consider doing so.
Get Your Miniatures Ready To Prime
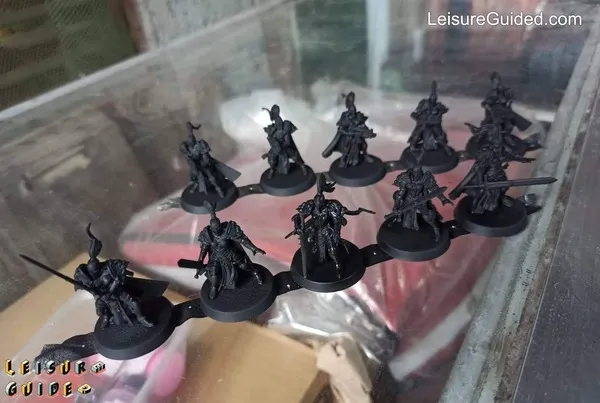
Arranging the miniatures for priming
Once you finish removing mold lines, filling gaps, sanding the model, and washing it, the next step to priming your model is to arrange them for the project.
If you are looking to get good results, arranging the miniatures for priming requires much more than placing them on the work desk.
A good way to arrange miniatures for priming is to:
- Use a handle
Whether you are considering using a paintbrush, spray can, or airbrush, it will be difficult to get primers all over its surface without leaving fingerprints.
To avoid leaving finger marks while you prime your miniature, use a handle.
It helps you keep your greasy fingers off your minis surface while priming it.
- Prepare your desk or workplace
You may think that your desk or working area is clean and tidy enough. Hence, your models won’t get dirty or fall prey to overspray. But, you can never be too sure.
Use a neat rag to clean your desktop before priming.
Get Your Primer Paint Ready
The right way to get your primer ready to prime
The most common problems you will often face when priming your miniature is the primer drying before it reaches the mini, bubbles forming after spraying primer, and pigment separation.
Since primers dry quickly, you want to keep a good distance between your tool and the model, especially when spraying or airbrushing.
Depending on the primer you use, give a distance of 6 to 12 inches away from the model. This way, the primer won’t dry before hitting the surface of your kit.
Another thing spraying too close to the model does is that it makes you unable to control how much primer goes onto the model’s surface. This causes overspray. To avoid this, stay within the recommended distance.
You should also consider the weather conditions when priming your minis.
If your workspace is too hot, the primer might dry up mid-air and leave bubble-like effects on your miniature’s surface. Cold temperatures are no good, either.
The best temperature to prime your model is 50F-75F.
It’s also important to shake your primer before use, especially if you are using a spray can. You don’t want the resins of the primer to separate and leave uneven coverage on your model.
Choose the color to prime miniatures
Before getting a primer, you should know that manufacturers design primers to match the basic color and specific needs. What does this mean?
Simply put, there are three basic colors for priming miniatures, white, black, and grey. However, you will also find colored primers from red to blue, gold, and even green to offer precise coverage for your choice of colors.
The biggest advantage this colored primer palate gives you is increased speed, or what miniature hobbyists typically call speed painting. This way, you won’t have to spend so much time on your model.
Miniature painters often favor grey because it is a great all-purpose color.
Regardless, if you want the paint light and bright colors on models, choose white/grey primer. For painting darker and somber colors on models, choose black primer.
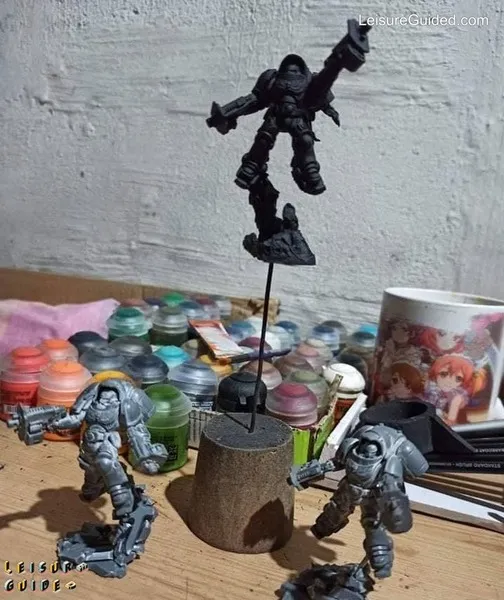
Finally, Prime Your Mini
Each painter has their way to prime their minis. The way I see it, if the result you get is satisfactory to you then there is no right or wrong.
Still, I think that we can learn something from each painter and improve our skills.
My way to prime miniatures
If you’re considering priming your miniatures, there are many ways to do so. Some prime with a spray can, others with an airbrush, and the traditional paintbrush remains a favorite for a few.
- Use A Brush
Brush priming is when you use a paintbrush to apply primer on the miniature’s surface.
The biggest con of using a brush for priming is that you can easily cover the small details on the miniature.
With a paintbrush, you want to apply multiple thin layers rather than a single thick layer of primer when using a brush. It will reduce your chance of obscuring small details.
- Use An Airbrush
Airbrush priming takes place through a process called paint atomization.
The airbrush uses air pressure and a compressor to spray paint on the miniature. All you need do is set the airbrush PSI setting on the airbrush and start spraying primer.
| Recommended settings for priming | Priming Small minis | Priming Large minis |
| Air pressure | 15 – 20 PSI | 20 – 30 PSI |
| nozzle size | 0.2 – 0.3 mm | 0.30 to 0.5 mm |
*Recommended settings according to Vallejo
An advantage of using an airbrush for priming is that it helps you achieve a more even color tone over the entire model.
Plus, it easily gets primer in hidden and hard-to-reach spots. However, some primers require thinning to work in an airbrush.
If you need an airbrush primer for your miniature, our article “The 7 Best Airbrush Primers for Miniatures” will help make your selection easy.
- Use A Spray can
Spray priming also works like airbrush priming. However, the difference between both is that spray can not allow for defined settings that help you spray thin, even coats.
A spray can is an easier method to work with as opposed to an airbrush.
But, unlike the airbrush and brush, you can easily cover details on the miniatures using a spray can since it does not allow precision handling and control. Spray primer also gets easily affected by humidity.
Of these methods, beginners will find using their paintbrush on their miniatures. Plus, brush priming works best when the weather stops you from using a spray can outside.
Still, priming with an airbrush often provides the best results, especially on miniatures.
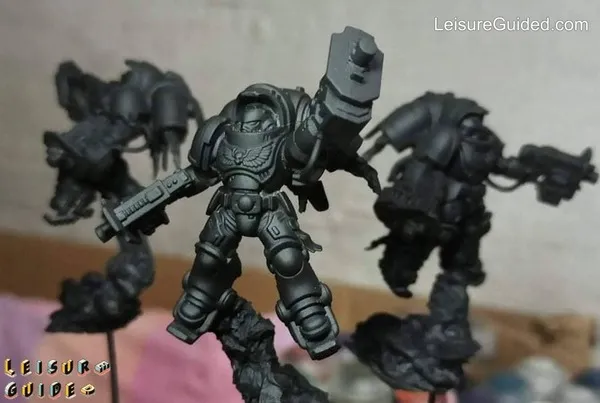
The right way to prime miniatures
Remember that not all primers behave the same. However, the single factor each share is that you need to apply the primer in thin layers to preserve the little details on your minis.
Hence, lightly prime the model to cover as little detail work. If your model is less detailed sculpts, it won’t matter if you have a heavier primer layer.
Brush-on priming won’t always guarantee the safety of your details, but an airbrush will. To an extent, spraying on primers will save details.
Besides this, always wait for the primer to dry well before applying another thin coat.
Applying a new coat of primer when the previous one isn’t dry means your paint won’t adhere well. Most primers dry in 30 minutes, and some take 1 hour to form a solid base.
The Right Primer For Your Work
Vallejo surface primer, Army painter warpaint air primers, Krylon primers, Rustoleum 2x primer, Tamiya miniature primers, and even the Citadel primers are some of the best in the market for airbrush, spray, and brush-on use.
What are the best primers to use on miniatures?
While several brands make primers, some are more high-quality than others. The best primers for miniature painting will have fine pigments, won’t smell, come in varying colors, offer reliable results, and last long.
To learn more about the characteristics of a “best” primer and which actually works well for your minis, read our guide on “What Primer to Use on Miniatures.”
| Brand | Pros | Cons |
| Vallejo Primer | – It can be sprayed and brushed – Excellent undercoat coverage | – The primers are thickly pigmented, unlike primers from other brands |
| Citadel Primer | – Levels smoothly on the miniature – Superior quality with exceptional adhesion – It offers excellent coverage in just one single thick coat | – Quite expensive – Designed for spraying so it can be toxic in a room with poor ventilation |
| Tamiya Primer | – Retains details even when you apply thin coats several timesSticks well to all surfaces – High-quality | – High priced |
| Rustoleum 2x Primer | – Large spray can mean you can use the primer on a large number of minis – It comes in different colors, so you can choose whichever suits your paints – Great on any material | – Won’t provide thick coats |
| The Army Painter Primer | – Easy to find at local hobby shops or game stores – It comes in many colors It applies thinly when sprayed from a proper distance from the model. Budget-friendly – Its enamel-base solution means it bonds well on a variety of surfaces | – It requires a ventilated area for safe use. |
| Krylon Primer | – It has all the basic primer colors – Great QualityMultifunctional | – You’ll need to shake nicely before using the materials, else they won’t adhere well |
Some priming tips
- Consider the weather
Ideally, you should prime the miniatures in temperature between 50-75 degrees Fahrenheit and a relative humidity of less than 60-70%.
If you prime when it is too humid, you get a dusty build-up on the mini.
- Light
Avoid priming in a poorly lit environment since you won’t know what the primed surface looks like at the end of the day.
Good lighting helps you see every area of your model so you don’t miss any spot.
- Keep a well-ventilated area
You also need to prime your miniatures in a well-ventilated area. Primers behave like paints. As paints, primers have fumes that can be harmful to your health.
If possible, use an outdoor workspace like the garage where you are guaranteed of constant air flow than in a closed-off room.
- Cleaning
Health and adherence-wise, cleaning miniatures before priming miniatures have its benefits. It keeps your model free from dirt and debris that may have formed when removing mold lines, filling gaps, and sanding its surface.
So, clean the surface before use since it keeps you and your model in good shape.
- Precautions
Also, take safety measures like using handles to avoid leaving finger marks.
Don’t forget to add ventilation, like an air booth, if you have an indoor workshop. Alternatively, use a respirator mask for added protection.
Conclusion
Ultimately, there really is no single best way to prime miniatures. However, airbrush primers offer better results than spray-on and brush-on options.
Just be sure to prepare your model and arrange it well on the workspace before priming to get clean, even coats.