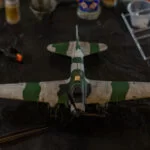
How to paint miniatures (most helpful guide)
You’ve built your model – now it’s time to paint it.
If you plan to paint your miniatures, you want to do so without sacrificing details and quality. From getting your tools to preparing your workstation, assembling the model, and painting your mini, learning to paint miniatures doesn’t have to be challenging.
This guide on how to paint miniatures will show you how to paint your minis the easiest way possible.
What tools and materials do you need to paint miniatures?
There is quite a long list of tools and materials miniature painters can use for painting their models. In fact, most, like the hobby knife, have several alternatives, making choosing a good tool for painting a chore. Nonetheless, the most common tools and materials you will need to paint your minis include:
- Pointed paint brushes of varying sizes
- A palate for thinning purposes
- Hobby knife, nail file, or mold line remover
- Soap and water
- Glue
- Primer
- Paint
- Thinners
- Clean rag
- Brush cleaner
- Airbrush (optional)
- Heavy duty gloves
- Flow improver (optional)
- Miniature handle
Get your desk ready
How organized your hobby desk or workbench is will determine how smoothly your painting project goes. In other words, a perfect workspace desk for painting miniatures should contain every tool to make your work stress-free, enjoyable and fast. Hence, if you plan on painting your minis soon, your work desk should have the following:
- Various sizes of paint brushes arranged neatly
Paint brushes come in different sizes for varying tasks. Some brush sizes help with detailing and highlights, a small paintbrush can help you paint hard-to-reach areas, a large brush works well for base-coating, and adding a wash and stiff-bristle brush will be perfect for dry-brushing. Just arrange them in a convenient place you can easily reach.
- Brush holder
You can easily get confused with several brushes of various sizes arranged on your desk. Plus, your brushes will lose their pointed tips placed carelessly on the desk. A good remedy for this will be to get a storage compartment for your paintbrushes. Luckily, brush holders won’t have to cost a fortune. Just get a mug or cup and arrange your brushes in them.
- Good lighting
Painting your model under low-intensity light will cause you to make mistakes. For this reason, proper lighting is essential when painting miniatures. Get a lighting fixture with a perfect color temperature between 5000 and 6000 kelvin. Yellow lights will look dim, don’t use them. Instead, use lights with bulbs bright enough to light up the whole desk.
- Handles
Besides the lighting, it’s easy to damage your paintwork by simply touching the miniature. To avoid this, ensure you have a painting holder on your desk. A tool like this holds the miniature while you paint it. It also stops you from rubbing your fingers on your painted miniature.
Get your paints ready
Paint is the most essential tool needed for painting miniatures. You won’t get that exceptional-looking finish you desire if they fail you. The question is, how do you prepare your paint for the painting project? Consider the following:
- Choose the color scheme
Color is complex, especially as they always have tones ranging from dark to mid-tone and light hues. What you should understand when choosing a color scheme for your model is that if you choose colors that complement and contrast each other, you can easily call attention to your mini figures since the color contrast will bring out the details of your model. On the other hand, some colors won’t look good on the model.
For instance, when painting miniatures you often use different tones of the same color to highlight or shade the miniature. The color you choose for your model should replicate under artificial lighting the way their real-world equivalents look under sunlight. Manufacturers make choosing a good color scheme easy by producing a paint set.
After you choose the colors you need to get them lined up on your desk, ready to be used.
- Shake the paint
Paints separate when kept for a long time and cause the color pigment to become unevenly distributed and may ruin your work. Before using them on your miniatures, shake them for some minutes so that their components recombine and give the best results on your model.
- Thin them
Whether you use water-based, alcohol-based, or oil-based paint, you should thin them before use. Paints often have high-density pigments that may obscure the small details on your miniature. To avoid leaving thick paints on your model, thin them down.
- Get a palette
How essential is a palette? Critical. A palette helps you thin and mix your paint.
You can either get a wet or dry palette. A wet palette keeps the paint from drying while the dry one aids with the dry brushing technique.
I know many painters will just paint straight out of the paint pot, but it is much better to get a palette with the paints ready on it for your paint job.
Prepare your miniature
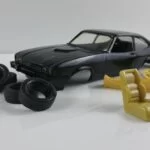
Before painting your miniatures, you should prepare them for the project.
Preparing your models isn’t just the ideal assembly process. It involves washing the model, removing mold lines, filling gaps, assembling the parts, and gluing them together.
First, you need to wash them in soapy water. Miniatures, whether metal, plastic, or resin, have mold-release remnants from the molding process that makes your model feel greasy when held. Most people don’t really wash their models, but this step is ideal because it allows your paint to stick better.
Then, remove the flash and mold lines. This step is pretty essential because it improves the perfect appearance of your paint.
Mold lines may look flat on an unpainted model. Yet, when covered in paint, anyone can easily detect them.
To remove mold lines, get a mold line remover, nail file, or X-acto knife and gently drag it along the mold line with the unbladed edge so you won’t leave more gaps on your model.
As a final process, start assembling your miniatures. Find parts that fit well and piece them together using glue. If your model is made from resin, use super glue. Miniatures made with plastic materials work well with plastic glue.
Get the base of the miniature ready
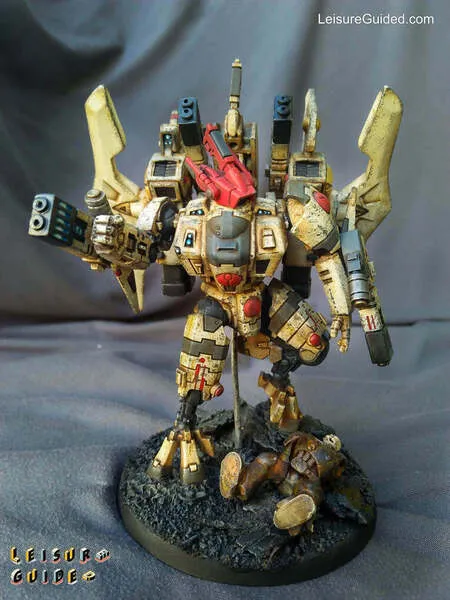
Whether you plan on painting a Warhammer figure, DnD model, diorama, or sci-fi mini, these figures can stand on their own thanks to their monster or human foot design. Yet, while they can stand alone, they need a base to support them and to give a better surrounding for the miniature.
The base of the miniature determines the scene. There is a difference between placing your miniature on a grassy base, lava-looking base, sandy base, etc.
Besides this, miniatures often used for wargaming or in roleplay, like the Dungeons and Dragons kits, should be mounted on a stable base so they don’t tip over. Hence, before painting your minis, getting the base ready is essential.
Clean the base, then get a good quality super glue to help you attach it to the bottom of the miniature. Ensure the super glue doesn’t obscure small details as you glue it to the base.
Prime your miniature
Before using actual paint on your miniatures, the first thing you need to do is to prime the model. Doing so helps the paint stick well to your minis.
Now, how do you know which primer you should use? Different brands make primers, but the difference is in their opacity and pigmentation. Companies like Rust-Oleum and Krylon make primers best for terrains because they go on slightly thicker. Vallejo, Army painter, and Citadel make primers with a thin consistency, which makes your application appear smoother.
On the other hand, manufacturers design primers differently, with some designed for use with a paintbrush, in spray cans, or for airbrush use.
If you use a spray primer, know that primers in a rattle can put you at safety risk since the paint and fumes might get into the air you inhale. So, if you’re considering using spray primers, priming your miniatures outside would be a wise choice. Then again, that doesn’t mean you can’t prime your miniatures inside your house. Just make sure your interior workspace is well-ventilated to keep your air safe.
Regardless, the best way to prime your model is to:
- Get your primers ready. For airbrush use, mix it with the right thinner. If it is a water-based primer, mix it with water. Alcohol-based primers work well with alcohol solvents. Miniature painters using a spray primer should shake it a few times for smoother results.
- Mount the miniature on a platform with a white tac, ensuring it sits perfectly on your platform.
- Don’t forget to wear a mask and glasses as the wind can sometimes blow the primer into your face.
- Start by spraying the underside of the model at a 45-degree angle.
- Whether you use an airbrush or spray primer, do short bursts at a distance of 15 to 20cm (6 – 8″), so you don’t cover details in a single spray.
- Be sure to control overspray, as you don’t want to get primer all over the place. To do this, get a cardboard box, and cut one side to make it look like a wide-open door. Then, place the miniature inside and spray.
- Also, consider the climate. Spraying primers in a cold environment can cause the primer to dry before touching the model, leaving a chalky finish. If your workspace is very cold, place your primer (mostly spray primers) in warm water as you prepare the model for priming to ensure better results.
- Don’t spray or airbrush directly on the model. Start slightly off the side and drag quickly across it. After this, spray its face 45 degrees from above with four quick bursts that last only about half a second.
- Check the model for any bare patches and do a slight touch-up if you find any.
- When using spray primers, always make sure to empty the nozzle upside down after spraying. Store it at room temperature, away from sunlight.
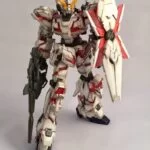
Base coat your miniatures
Once you have primed the miniature, you can start painting them. The first step to doing this is to apply a basecoat. A basecoat is the first layer of paint on the model. Basecoating miniatures usually work like this:
- Pour a small amount of paint on your wet palette and thin them to a perfect consistency
- Take your paintbrush and paint the hard-to-reach parts first
- Apply the paint in several thin coats. Avoid painting thick coats as they may cover the fine details of your miniatures.
- Always wash the brush when changing colors so that they don’t mix. Then, roll the tip of the brush against a damp cloth to make it pointy again.
- Ensure the paint doesn’t dry on the brush as you basecoat
- Let it dry and move to the next step
- when base coating your miniature its best to do it fast and try to cover any surface of the model.
Shading or washing miniatures
This technique helps you highlight shadows, do wear effects, and cover cracks, creases, panel lines, and crevices on a model. The unique part of wash paint is that they are slightly thinner than regular miniature paint. But, their thin form often leaves a darker effect over the base coat. A quick way to use washes is to:
- Use them directly from the bottle or on a palette. Washes are thin and won’t really require thinning
- Apply your washes in several thin coats
- The paint might pool in areas where you don’t want it. Remove the excesses using a dry brush to soak up the excess paint.
- Always aim for the lower parts of the model and avoid raised surfaces
- Let it dry
Dry brush layering
Since washes work well on flat areas, you need to give the raised surfaces attention. The dry brushing technique will help you achieve this.
Drybrushing is a highlighting technique that helps you highlight the raised surfaces. But, unlike typical highlights you will create on armors, dry brushing works better on natural textures such as wood, rock, earth, and fur.
All you need to do is apply a small amount of paint (usually a lighter color) on the raised areas. Then, drag the brush over the grain of the texture on your raised surfaces. Still, a proper dry brushing technique will involve something like this:
- Don’t just load the tips of the brush. Also, load the bristles with paint.
- With a soft towel, remove excess paint, leaving only the color pigments on the bristles.
- Flick the brush gently over the raised surfaces. This way, the pigments catch the edge details.
- Let it dry
Highlight
This technique stimulates the effects of light reflecting on the raised parts of your model. As mentioned above, dry brushing and highlighting have similar purposes. The only difference is that highlights work better on armor. To highlight your model for the best results, do this:
- Thin down the paint to make it lighter than milk consistency
- Run the paintbrush in the paint until it covers the flat bristle body of the brush
- Start adding highlights by slowly building layers for a smoother transition.
- Highlight raised areas by dragging the brush on their edges so the paint can come off easily. This saves you the stress of painting with the tips of the brush.
- If the paint runs too runny, clean off excesses with a soft paper towel
- Let it dry.
Detailing
Most times, miniature painters overlook small details on the model until they finish painting the main details. Detailing helps you paint these small details you previously neglected.
Here, you won’t have to paint the details as with other surfaces. All you need to do is determine how much you want a particular detail to stand out and paint them.
Detailing you miniature can be the difference between a good painted miniature and an amazing painted miniature. try to get references for different details on faces, weapons, armors, etc. to determine which details you want for your mini and paint them on.
Final touches
No matter how well-painted your model is, there is always a detail you may need to clean up and correct you previously missed. Yet, this is often the most overlooked part of the painting process.
What most mini painters don’t know is that adding some small touches besides the other essential steps helps give the model a more natural look. Plus, it binds your models, especially when painting armies, giving them a more uniform look.
Finishing touches will involve you painting elements like grass and stones. Then, protect the paint by applying varnish. Depending on your choice effect, the varnish may look satin-ish, glossy, or matte.
How to paint techniques:
Now that you know the general rule on how to paint miniatures, it’s time you know how to attain special effects on skin, eyes, fire, metals, and even create rust.
- How to paint eyes
A well-painted pair of eyes brings your miniatures closer to looking more realistic. However, it is one of the trickiest parts of painting your mini. Still, it’s not impossible to achieve. To paint eyes:
- Prime the model. Always use a dark shade primer for the center of the eyes to easily achieve contrast.
- Choose your color scheme. Paint the enter eye area with off-white paint. Most people use white, but it gives a more cartoony effect. Dark blue and brown are two colors that often look good when painting the pupil and iris.
- Instead of painting a dot to display the iris, run a vertical line through the center of each eye.
- Use a darker shade of the skin tone on the miniature to outline the eye area, ensuring the color doesn’t touch the eyes.
- Then touch up the painting where necessary
- How to paint skin
People come in all shapes and sizes. Skin tones won’t be any different. But, there’s a catch! Painting miniature skin can be tricky since you will mostly come across Irish, Caucasian, South East Asian, African, and even Ork skins.
Then again, if you are painting a female, you need to consider parts like the bust to successfully create a natural contrast.
Generally, painting skins involves three simple steps: Apply a base paint, wash for detail and highlight the model using three to four layers and glaze. Regardless, here is what painting skin looks like.
- Basecoat
- Apply the first skin tone to create a skin-like shadow in a series of highly diluted glazes. It gives the flesh tones a luminous quality and natural appearance.
- Develop the shadows using a lighter skin color on the most exposed skin features. Building up the intensity of color from a light base helps you create more subtle tones.
- Highlight the raised and exposed aspects of the skin to make it look more natural
- Let the paint dry.
- How to paint faces
Faces are also a tricky part of the model to paint. But, you can achieve this using a size 00 brush for basecoating and a size 0 brush for detailing. You will also need a wash to paint faces. Painting a face takes only five steps, base coating, applying a wash, eyes, highlighting, and detailing.
- Begin with priming the model
- Select a skin tone and paint the entire head. Use a light skin tone on faces as you will want a wash to darken the skin.
- After applying the basecoat, apply washes lightly in several layers. Use the tip of the brush to work the wash into deep creases and detail lines on the face
- Get white paint and paint the entire eye and teeth area
- Select a darker shade of skin tone and use it to reshape the eyes
- Thin down a small amount of your base skin tone to apply highlights to the raised surfaces on the face (the forehead, nose, eyebrows, jawline, cheekbones, and chin) to make them catch the light well. Apply highlights in thin layers. This way, they look clearly defined
- If the highlight paint pools in places you don’t want them to, use your brush to remove excesses
- Leave the paint to dry.
- How to paint rust
Special effects like rust are one of the easiest effects to create. A simple way to paint rust on your model is:
- Apply the basecoat
- Use a wash over the basecoat to paint flat details. Since you are painting rust, you will need to create weathering effects.
- Pay attention to any corner on the model, such as the shield and shoulders, prone to rusting. Then, use the wash to build up spotty and gritty textures in a few layers to make them look more corroded.
- Also, create chips effect with your paint. Get a toothpick and scratch on the edges where you want to make rust effects.
- Paint the middle of the chips with the washes to leave a shadow around it that looks like rust
- Let the paint dry.
- How to paint fire
Painting flames is probably one of the most challenging effects any mini-painter can create. But, when you achieve it, it looks pretty unique and interesting.
The trick with painting fire is to perfectly blend the light and dark areas for a smooth transition. Generally, a model is dark in the recesses and lighter in raised areas. With fire, because hotter areas are brighter, you paint fire has a white or yellow deep color inside and get progressively darker (orange than red) the farther out you go. In short, this step teaches you how to blend paint.
Another interesting fact about painting flames is that it doesn’t have a dry time. After applying the primer and letting it dry, keep adding paint. This technique is best known as wet blending in miniature painting.
- Prime the model
- Start with a white base coat in thin layers
- Immediately after applying the basecoat, progressively add yellow, orange, and red colors over the raised portions of the fire.
- Wet blend the edges of the paint by pulling the orange and red or black paint, at the edge, together and inside the miniature contours, so the transitions are smooth
- Let it dry
- How to paint metals
Metal is a common material used for making miniatures. If you have a metal kit, here’s how to paint it.
- Clean the model
- Examine castings for excess metal mold lines and flash and remove them
- Fill gaps or patches with a gap filler so that when you paint the model, it blends well
- Apply primer to make the paint adheres well
- Apply your base coat. Choose a paint color that complements each other and works well on the model. To apply basecoats, use small-sized brushes and rub the paint in thin coats.
- Apply details using washes to the model by painting the eyes and deep creases on teeth and clothes to give your model more depth.
- Varnish the model to get a matte, gloss, or satin finish. This process also protects your paints from chipping.
Important tips when painting miniatures
- How much paint to use
The trick to getting your model as close to natural or real as possible is to avoid painting thickly on the model. Instead, thin the paint if it has high pigments to milk consistency that allows you to paint multiple thin coats.
- Properly mix your paints
Paints are made up of pigments, binders, and liquid solvents (alcohol, water, or oil). Still, while all these things produce your paint, the fact is that they are separate entities. When left for a long time without use, the pigments separate from the solvents.
It means that if you paint your miniatures with the materials that make up your paint separately, you aren’t using paint but something else that leaves a mess on your models. Before using the paint on your miniatures, shake and mix for a few minutes until the paint components bind together.
- Control your brush
How well you control your brush strokes also determines the effects you get. Paint, like washes, can easily pool on areas you don’t want them to be. On the other hand, exerting pressure when applying paint thinly on your model can leave brush strokes, making the finish look rough. Instead of hard pressing the brush, apply paints using feather-light touches so you won’t leave brush marks on the model.
When you paint miniatures it’s always good to keep in mind how good is your brush control. this is one of the skills that separate brilliant painters from good painters. The brush is our tool, and the better you control it, the better results you’ll get.
- Clean the brush after each pain applied
whenever you use different colors, make sure to clean the brush so the colors dont blend and turn into a different color, one that is not part of your intended color scheme. Sure, some mistakes can sometimes turn into a better results, but in general, you want to start with a clean brush when painting different colors.
Also, your high-quality sable paint brush can easily damage if the paint dries in the bristles and enters the brush’s ferrule. Plus, it’s easy to damage the color contrast you try to achieve when you fail to wash the brush.
Clean the brushes after use to prevent build-up in the bristles and avoid damage to the painted model.
- Cheat where you can
Simply put, work smart.
If it involves painting your miniatures, cheating is allowed, especially for beginners. As an entry-level painter, you won’t always have the skills to paint a 100% detailed model. The trick is to give more attention to parts of your model that is more noticeable.
- Always varnish your miniatures
Paints, no matter how high quality, are prone to chipping. A varnish is a protective paint that keeps the undercoat paint from chipping. Make sure to apply varnish after painting.
- A dry palate saves you time
Most experienced painters recommend getting a dropper bottle to mix paint, but this can be time tasking if the paint comes in a pot. A dry palette allows you to mix and blend paint to milk consistency before painting.
- A wet palette saves you paint
Paints easily dry left open for long, but the advantage of using a wet palette is that it keeps your paint wet longer than in the paint pot.
Conclusion
Painting miniatures is tricky and at the same time, easy. You just have to find the right tools and models that catch your attention and colors you love to keep you engaged in the process. And, when it comes to painting your model, whether the faces, skin, eyes, or effects like rust and fire, stop where you feel the happiest with your results. In the end, you will have painted a satisfying piece, no matter your skill level.