How To Bind Any Receiver With Any Transmitter (Guide+Video)
When it comes to RC transmitters and receivers, things can get a tad confusing for beginners.
This is absolutely understandable, as radio technology has a tendency to fly over the heads of some.
In this article, we’ll help you gain a healthy understanding of how to bind any transmitter with any receiver.
Can You Bind Any RC Transmitter With Any Receiver
If you have somehow lost or broken either your RC receiver or transmitter, you may have a spare, but different brand of either one, but will pairing one brand with another actually work?
You can bind any receiver with any transmitter, but you must make sure that either the transmitter and the receiver that you use are of the same frequency range.
A 2.4 GHz transmitter will work with any 2.4GHz receiver, but not with other frequency receivers.
Most RC transmitters and receivers today use a frequency of 2.4GHz.
How Do I Pair My RC Receiver to Transmitter
For a first time user, you may be wondering how to even pair your RC transmitter and receiver together.
Since this question is multifaceted, we’ll be covering the basics of not only pairing your RC transmitter with your receiver, but also how to change the frequency of a crystal based receiver, just in case you have either lost or broken your transmitter and need to use one that operates on a different frequency.
How To Bind RC Transmitter and Receiver
To pair the transmitter with the receiver of your RC car, you will need to locate a pairing button on your transmitter. The button should be labeled something like “bind-key”.
1. Connect the receiver to the control board of your RC vehicle or aircraft. Make sure the receiver is powered on.
2. Turn on the transmitter and set it to bind mode. This process will vary depending on the make and model of your transmitter, so consult the manual for specific instructions.
3. With the transmitter and receiver both powered on, press and hold the bind button on the transmitter. This will typically be a small button labeled “bind” or “bnd” that is located on the back or bottom of the transmitter.
4. While holding the bind button, turn on the power to the receiver. The binding process should start automatically, and you should see the receiver’s LED flashing rapidly.
5. Once the binding is complete, the LED light on the receiver should stop flashing and remain solid. At this point, the transmitter and receiver are bound and should be able to communicate with each other.
6. Test the transmitter and receiver by moving the sticks and switches on the transmitter. The RC vehicle or aircraft should respond to your inputs.
As you hold the bind key down, you will need to turn on your RC transmitter remote. When you do this, there should be a solid light on your receiver. If you see this, then the pairing was a success.
*You may need to try this a few times before it works.
How Do RC Transmitters & Receivers Work
Some of you may be curious about the underlying mechanics of how your RC transmitter interacts with its linked receiver to make your RC car run.
It’s definitely an interesting process, so let’s dive in!
When you pull the trigger down or press the stick on your RC transmitter remote forward, the transmitter will send a series of signals to the receiver.
After this, the motor of your RC car will activate, and depending on how hard you press, the motor will run faster, allowing for your RC car to run faster.
The receiver also controls the servos inside of your RC car, so when you want to turn by using the knob or stick on your RC remote transmitter, the receiver will tell the servos to steer the tires of your RC car.
What Is A 2.4GHz Frequency In An RC Transmitter
You may be wondering what we mean by “2.4GHz” when we mention it.
Really, this is a rather simple concept to explain.
A 2.4GHz band is a shorter range spectrum of radio frequencies that is used by most RC car manufacturers.
This band is a standard in the industry, and this is due to the increased number of frequencies that you can operate your RC model on.
Another benefit to the 2.4GHz frequency is that it allows for very little or no interference from other RC devices.
RC Receiver & Transmitter Frequency Explained
Now that we have a basic idea of how RC transmitters and receivers work, we must now try to understand the radio frequencies on which they operate.
The frequencies that transmit between the controller and the RC car (the transmitter and the receiver) are used to control the steering and speed of your RC car.
The frequency that most RC cars operate on is 2.4GHz, which is an upgrade from the old method of using a fixed channel of 40, 36, or 27mhz.
Whenever you use your RC remote to increase your RC car’s speed or steer, the transmitter inside of the remote sends a series of radio signals that are picked up by the antenna of the receiver, which then interact with the circuitry of the circuit board and activate certain electrical components inside of your RC car to accomplish a specific task.
Binding Crystal Based Transmitters and Receivers
Even though many reputable manufacturers don’t often use the transmitter and receiver crystals, it’s still our duty to help those who may have these crystal based transmitters and receivers, so let’s get into it.
Under the chassis of your RC car, there will be a receiver crystal. On the receiver crystal, there will be a tab. Simply grab this tab and pull it out. You have now removed the receiver crystal.
Next, you will need to replace the crystal that you just pulled out of the receiver with another crystal that will match the frequency of your transmitter.
Find the receiver crystal that is compatible with the transmitter crystal, and simply slide it into place inside of the RC receiver. This will now allow you to control your RC car.
But what if your receiver crystal isn’t compatible with your transmitter crystal? What if you need to instead replace the transmitter crystal because you don’t have a spare receiver crystal?
The transmitter crystal will be on the front of your RC transmitter remote, and it will be contained in a small black housing. Slide the housing out of the RC transmitter remote, then slide the transmitter crystal out of the housing.
Now find the appropriate transmitter crystal and slide it into the housing that your previous crystal came out of. Once this is complete, slide the new crystal into the RC transmitter remote. The crystal can be inserted either way.
Now that you know how to successfully change your transmitter and receiver crystals, you can rest assured that you can continue to have plenty of fun with your RC car.
Can You Change Your RC Receiver To Fit A New Transmitter
Let’s say that you lost or broke your transmitter, but you don’t have a spare of the same frequency that your receiver accepts.
In this scenario, you would need to somehow get a receiver to accept the input of a transmitter that doesn’t match the frequency of the receiver.
Is this even possible?
Yes. You can absolutely get a transmitter of a differing frequency to be compatible with your receiver, but it will take some tweaking of the receiver to accomplish this.
However, it is not recommended to do this on your own, especially if you’re not experienced in performing such a modification. You should opt to send the receiver to a professional to get the modification done.
Can You Mix Any 2.4GHz Transmitter & Receiver
In the case of you losing or breaking a 2.4GHz transmitter or receiver, you’ll want to know if you can bind a spare with another transmitter or receiver of a different brand.
If the spare, but differently branded transmitter or receiver you have operates on the 2.4GHz band, then you can absolutely bind them with another transmitter or receiver of a different brand. However, you cannot use an RC car remote to control an RC plane or boat.
Why Should You Replace Your Transmitter Or Receiver
There are many reasons to replace your RC transmitter and/or receiver, but many of you may not be privy as to what the reasons for replacement are.
The most common reason to replace a transmitter and/or a receiver is due to wear and tear.
After years of use, or maybe even months (depending on how rough you use your RC car), your RC transmitter or receiver will eventually go bad. This is natural, so don’t unrealistically expect these items to last forever.
Allowing water to get into the electrical components of the transmitter or receiver can result in a short circuit, which can break your transmitter or receiver completely. This will call for replacing one of those items.
It’s a good practice to keep your transmitter and receiver far away from bodies of water. Even using your transmitter in heavy rain can pose the risk of breaking it, so keep an eye out.
Losing the remote transmitter for your RC car is a very common reason to look into a replacement.
Plenty of people either misplace their remote transmitter or completely lose it. It’s a good idea to always be mindful of where you’ve placed your remote transmitter. Always make a mental note of where you last left it.
Best RC Transmitters & Receivers
For your consideration, here are three of the best RC car transmitter and receiver packs on the market, all with their own reviews to help you decide what you need/want out of your RC experience.
The DUMBORC X4 4CH RC Radio allows for stupendous control of your RC car at a whopping 200 feet, even with things like trees and other obstructions in the way!
Without obstructions, this RC remote transmitter can reach up to 500+ feet without going out of range.
With smooth and precise throttle and steering, this RC remote transmitter is sure to impress and give you lots of long-range, long-lasting fun!
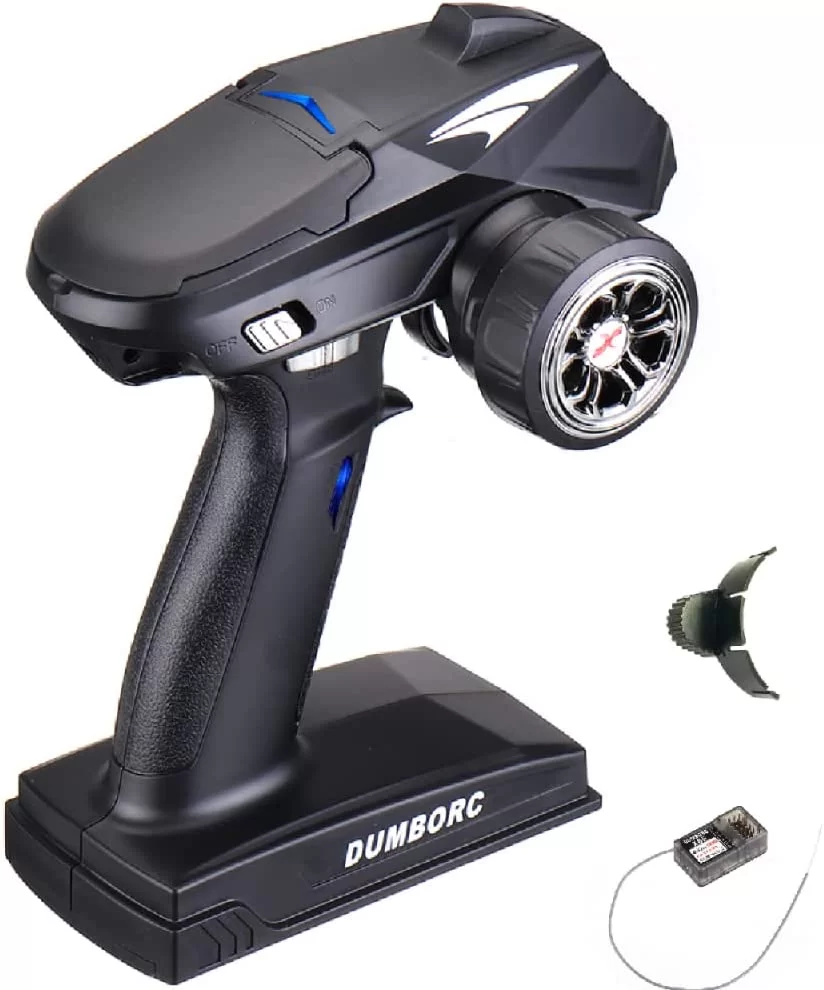
DUMBORC X4 4CH RC Radio
The Radiolink RC6GS V3 7 Channels RC has screen that feeds you real-time information with a simple and easy-to-use interface for maximum control of your RC car.
With a staggering range of up to 1,900 feet, you can watch as your RC car races to longer, greater distances and over the horizon to greener, more extreme pastures.
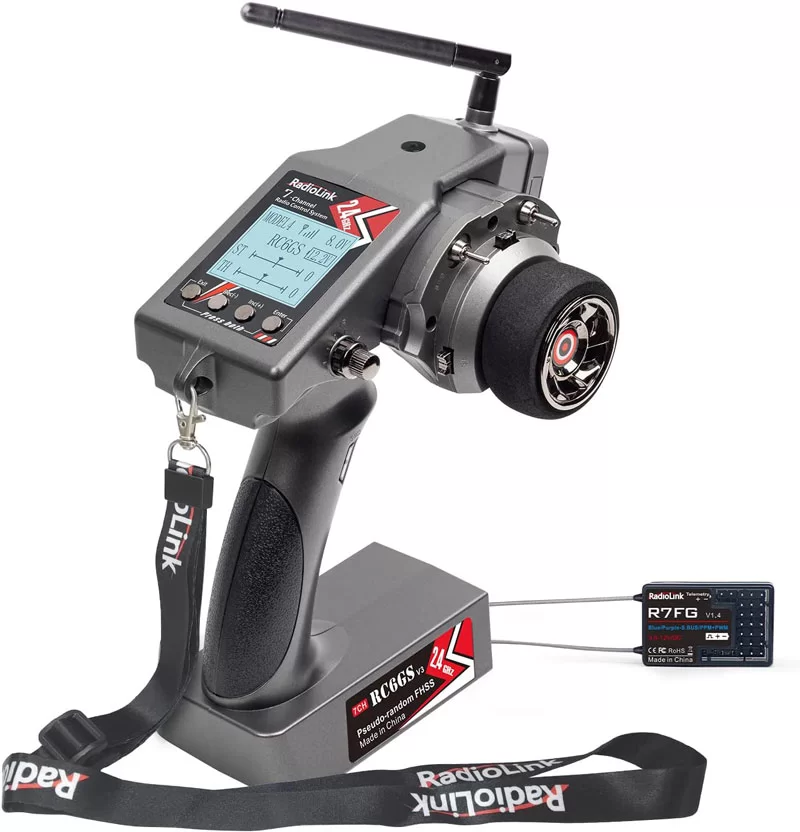
Radiolink RC6GS V3 7 Channels RC
The Radiolink RC4GS V3 4 Channels RC Transmitter has great anti-interference measures, has a range of up to 1,300 feet, and a built-in gyro to keep your RC car on the straight and narrow.
This transmitter also comes with a high voltage warning, just so you don’t completely destroy your battery.
Radiolink RC4GS V3 4 Channels RC Transmitter
Conclusion
As we bring our journey through RC remote transmitters and receivers, we must reflect on what we’ve learned.
In summary, we’ve learned that you can pair any transmitter or receiver with another transmitter or receiver, just as long as they both operate on the same frequency range that your old one did.
We’ve also learned that keeping your equipment away from bodies of water is very important, and is still important when it comes to heavy rain.
Of course, we have also looked at some of the best transmitters and receivers on the market, which gives us an idea on what we should be looking into as a means of replacing our current, perhaps outdated technology.
With everything said and done, we hope you find the best transmitter and receiver for you, and we hope that you got the most out of this article.