The Dos and Don’ts of Painting Miniature Bases
How do you base your miniatures? Do you paint them and glue before basing the miniatures or glue them before painting? Do you use super glue or plastic cement?
Bases play a crucial role in making your tabletop miniatures stand out. Hence, how you base your models will impact their overall appearance.
Want to learn the right way to base your miniatures? In this guide, we discuss some important steps to consider when basing miniatures.
Introduction to Painting Miniature Bases
As mentioned earlier, bases make your miniatures look gorgeous – but that’s not the only thing they do.
Miniature bases provide a stage for your model to stand while giving the models a unique theme or terrain through textures, shapes, and colors that differentiate them from others.
Most mini painters often skip this step when painting their miniature models. If you love the Wargaming universe, especially the Warhammer models, you really do want them since they give your model more height and statement value.
Before you start basing your miniatures, you need to know that bases come in three different styles – the round basses, used mainly for plastic miniatures, and the square bases, typically made of wood or metal. Besides this, most mini painters make their own bases for their miniatures.
Want to learn to make miniature bases? Read our guide on “How to Make Bases for Miniatures.”
Dos and Don’ts of Painting Miniature Bases
Painting miniature bases is tricky but super easy with the right hacks and skills. To ensure a seamless process, here’s what you should do when basing your miniatures.
- Mix PVA and Sand for Sand Texture
When making land, most mini painters spread the glue across the base and then sprinkle it on the sand and rocks, but this technique won’t last long. To ensure durability and ensure all of your sand and rock sticks well, I mix PVA glue and sand before applying it to the base. Don’t fear the glue/gravel mixture. It won’t make you lose the texture you intend to create on the base.
- Do the Lazy Trick
Sometimes, spending time on one thing can make the whole process feel tiring. To avoid this, a lazy and fast trick I often recommend when basing miniatures is to use texture paint, wash the base, and drybrush paint. If the texture paint is dark enough, you don’t even need the wash!
- Use Plastic Cement on Plastic Basis
If you’re planning to use a plastic base for plastic miniatures, invest in plastic cement. Bare plastic will only glue well when held with plastic contact. So, if you use PVA you might spend long hours on a messy job.
Superglue adheres to metal and wood bases better, whereas plastic cement works best on plastic bases as it melts the two pieces together to help them merge well. That being said, some of the figures really are a pain in the ass to get a good bond with.
- Always Base the Model First Before the Model
A finished base makes a model look great even before you complete the whole process. If you base your minis first, your model will start to look close to being finished much earlier in the process. So, base your models before you undercoat them, then paint the bases first.
- Use What You Have
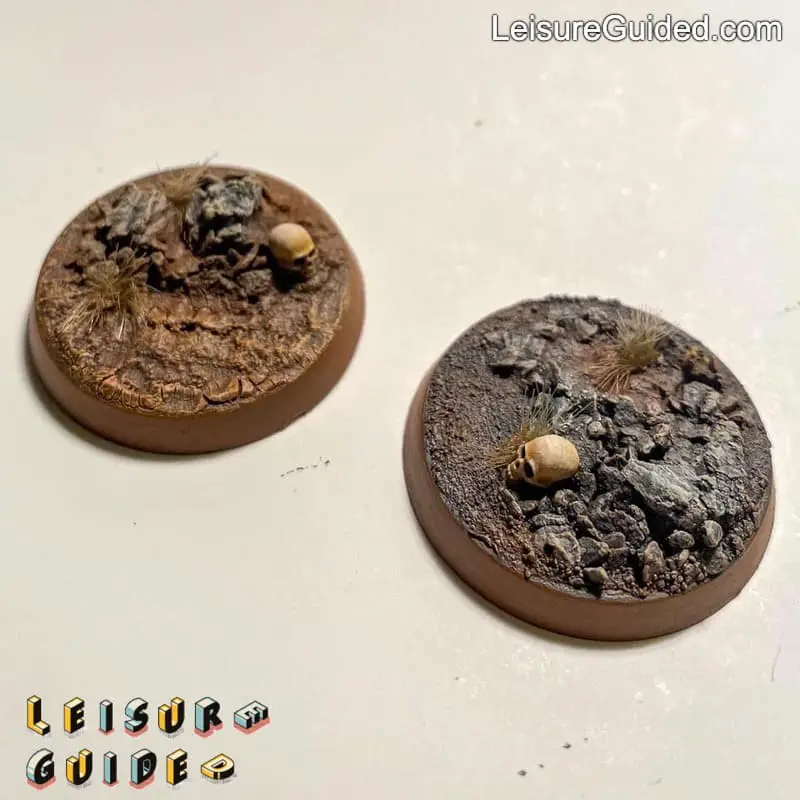
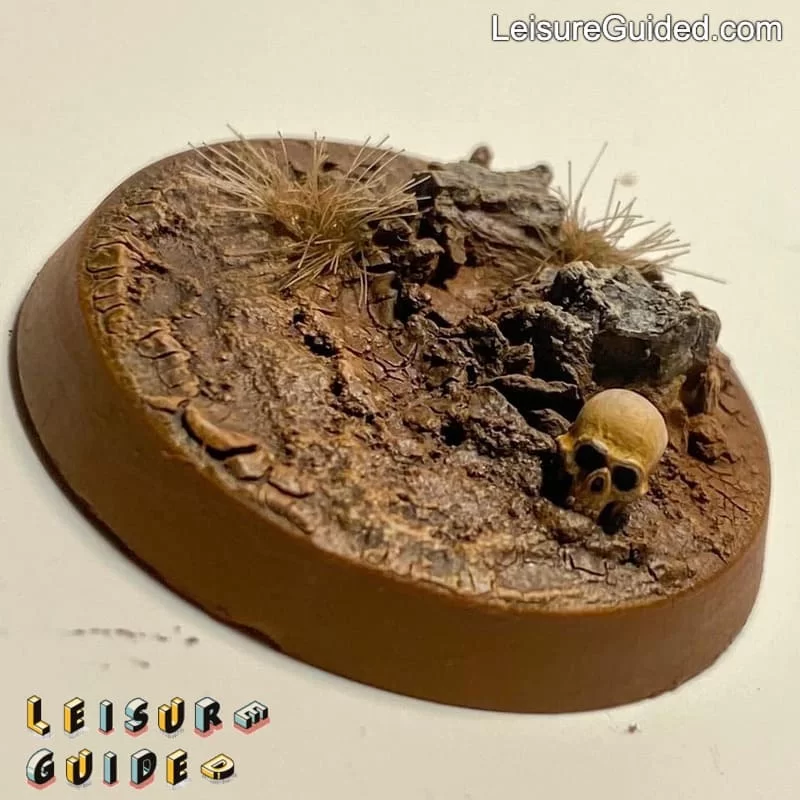
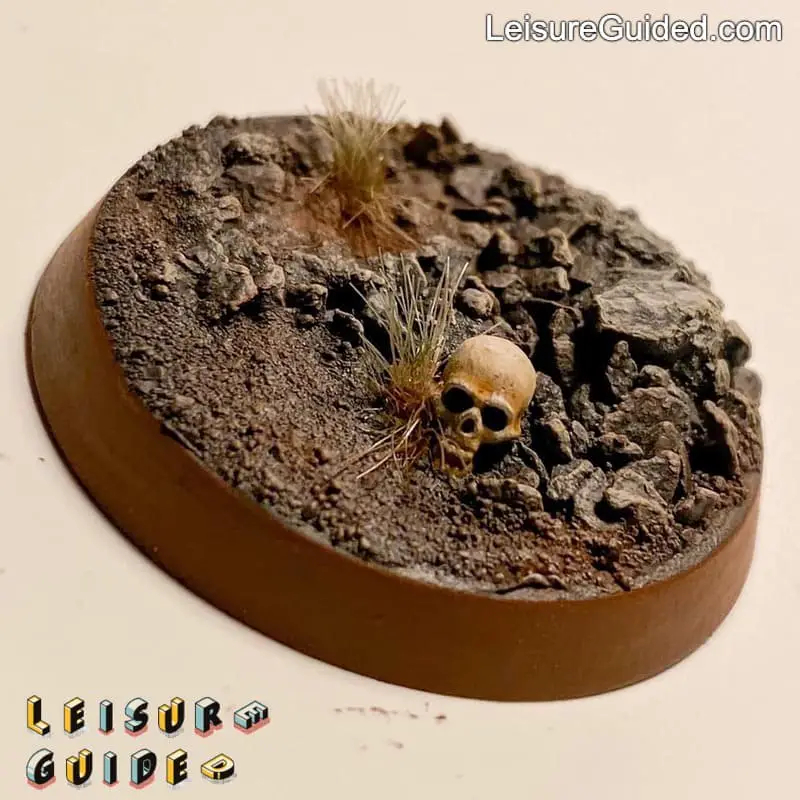
When it comes to basing miniatures, the truth is that you won’t always find the material you need, and if you want to buy some, there are a few terrain paints you can buy. For muddy dirt, Citadel makes a Stirland Mud, and you can also buy tufts and static grass to add real grass textures.
However, materials like small rocks, wood twigs, water, and sand are hard to come by. To ensure you achieve your aim, check around your environment and get creative with what you can find.
- Glue Miniatures on Textured Bases Wisely
If you’re considering making a textured base, be careful not to get it in or too close to where your model will stand. Doing so will make you snap the feet off the mini by mistake since you won’t be able to get it out with the texture blocking the edges of the model stand area.
- Want to Go Easy? Don’t Add Grass When Basing for General Terrains
If you have miniature models used in different terrains, adding mini grass to the base may not be visually useful for various settings. Imagine a grass-covered base and how they appear as the minis are deployed in a dungeon setting.
When making bases suitable for multiple terrains, you have to make the base vanish visually. I typically use a black primer, then some neutral gray, and a quick dusting of gravel to give it a regular asphalt base. Bases like this are good no matter the type of miniature terrain the figures are placed upon.
- Always Pin Your Model on Texture Terrains
When fixing your figures to the base, don’t simply glue the minis to the textured terrain surface since the bond won’t hold well due to the textures. On the other hand, with the base surface being pitted and uneven and the feet of your model being smooth and flat, they will come off with the slightest pressure. To avoid this, pin them through the base.
Techniques for Painting Miniature Bases
What you need
- Sand
- PVA or White Glue
- Brushes (preferably older ones)
- Paints (Earthy browns, Stine color, earthly brown wash)
- Static Grass
- A base
The Process
- Glue and pin the model to the base
- Glue sand to your base. Mix the PVA glue and sand with an old brush before applying it to the base. Before it dries up, sprinkle gravel on it and let it dry.
- After the glue dries, brush off excesses using a large soft brush so they don’t become loose after you finish painting.
- Prime the base with black primer
- Add a medium brown basecoat. Here, we use Game’s Workshop Steel Legion Drab. Thin the paint and mix well to make it easier to work with. Then, apply it all over the base and let it dry.
- Next, use Game’s Workshop Baneblade brown on and drybrush the entire base to make it stick to the earth texture well and add more depth.
- Repeat the previous step using the Mechanicus Standard Grey to pick out the raised areas like a rock.
- Again, highlight the base using Games Workshop Ushabti bone light tan to create some variation of color on the ground surface.
- As a final step, apply dark brown earth (Agrax Shade). Make sure to thin it before fixing it on the base to unite the various layers of the paint while also flowing into those recesses and creating shading, which enhances the level of realism on the base.
- Once the paint is dry, sprinkle static grass over PVA glue on the base to create a glass effect. Next, use a light brush to remove excesses.
- Seal the base with a matt spray varnish to remove any shine from the glue and keep the grass in place.
Conclusion
The right technique and consistent basing make the difference between a nice model and a great model. Basing can look good, but only if it’s done well enough and is in scale with the paint job. If you’ve tried several times and can’t get your base right, we hope these tips and techniques will make your task easier.