How to use Gundam markers (The Right way)
Gundam markers remain a controversial topic amongst experienced and beginner hobbyists alike. Different markers have different features, which in turn affect their uses.
From my experience, you’ll learn how to make the best use of your Gundam marker set and make sure you get the right marker for the right application.
The right way to use Gundam markers
There are various kinds of Gundam markers on the market, so it can be confusing as you try to figure them out. This is especially true if you are a beginner.
An easy way to know what type of Gundam marker you’re looking at and what it can be used for is to look for some particular features. The size of the nib, the kind of paint used, and the colors available all contribute to this categorization.
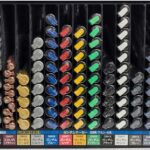
Liner Types, Brush Types, and Pour Types are the three primary classifications for Gundam markers.
How To Use Liner Type
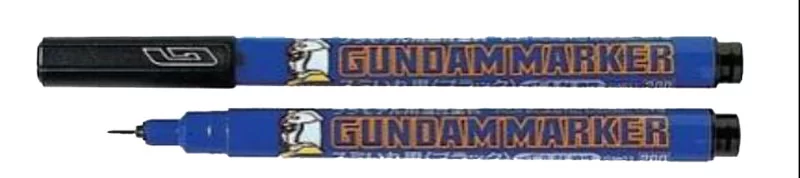
Liner Design Gundam markers feature a hard-felt tip with oil-based pigment and may be distinguished by their blue casings. These markers may be used to create smooth and consistent lines on the surface of a model, as well as simple line paneling.
Liner Type markers, which are available in black, brown, and gray, are very useful for detailing minor components such as air vents.
Using your liner-type pens for panel lining is straightforward:
Simply use the markers as a regular pen and apply a bit of pressure to release the paint.
After painting back and forth in the panel lines, a uniform coat should be achieved.
Using The Brush Type
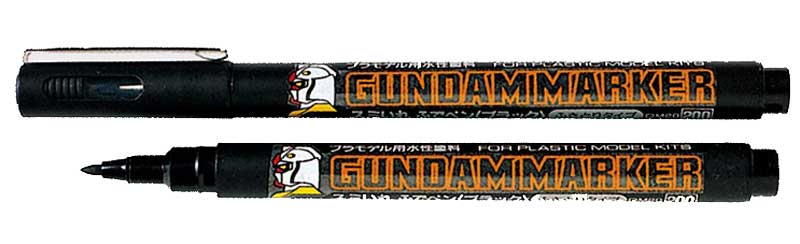
Brush-type markers were manufactured as an improvement to the liner-type pens.
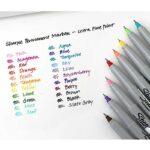
They are the Gundam markers that contain acrylic paint. Brush-type Gundam markers include brush tips that are flexible and available in a variety of colors.
Because of its acrylic-based ink, which is extremely versatile, these varieties are more popular among Gunpla hobbyists.
To use brush types for panel lining, simply apply like a liner type. Its paint is fluid and easily fills troughs or molds.
To use brush types for weathering and touch-ups, make sure the pigment is properly agitated before pressing it on the surface. This is to ensure a uniform coat.
Using a Pour Type Gundam marker
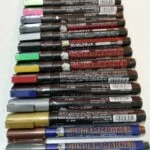
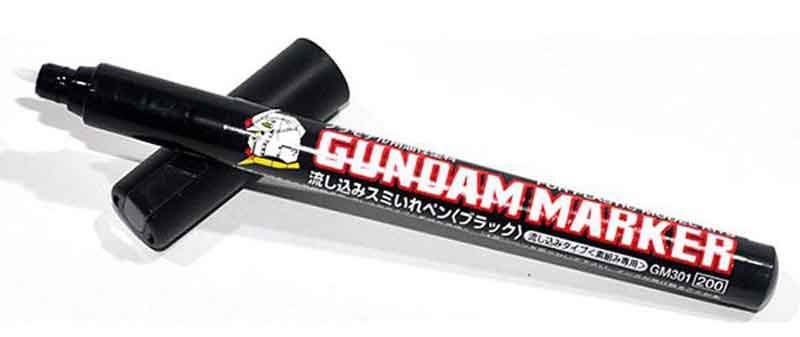
Pour Type is the last kind of Gundam Markers. They include oil-based pigments and have distinct solid plastic tips.
When panel lining, these markers will either pour out or make a smooth ink flow that is drawn into the panel lines by capillary action.
For weathering, it can produce panel touches and shadows of metallic surfaces, grime, dirt, and other characteristics.
When weathering, it is better to release the ink into a pan and apply it with a cotton swab. And as an added benefit, they come in a variety of colors.
How to use Gundam markers for panel lining
For panel lining, pour-types and liner type Gundam markers are your go-to markers, although the liner type is the most suitable for panel lining.
To line panels with liner-type markers, lines drawn with the markers should be drawn directly into the piece’s groove.
For best results, push the tip of a liner-type marker into the crevices of the kit that may benefit from more definition, such as panel lines and air vents, to utilize.
The marker should release its paint after exerting pressure. Like an ordinary pen, the marker must be put through the panel lines.
Then the paint can dry.
When using pour-type markers, the advisable way is to maximize the capillary action of the markers.
Pour-type markers are designed to release paint in large quantities at once.
Capillary motion causes the model’s hollows and grooves to suck ink from the pen. This quickens the filling of the space.
Allow the paint to dry once the excess paint has been removed.
As an alternative to the liner and pour type markers, brush types can also be used for panel lining. The paint in Brush Type markers is flowing and diluted, and so it penetrates deeply into panel lines.
To get an equal width in the panel lines, the technique may need to be repeated.
Sloppy lines are prevalent due to the bigger brush tips. They can be readily cleaned to show crisp panel lines.
Don’t use Gundam markers for large surfaces
While Gundam markers are good enough for use in detailing and small touch-ups, using Gundam markers for large surface areas is not advisable.
This is particularly true when trying to repaint an already painted model or trying to get a uniform coat on your model.
It is much easier and faster to use actual paint to get an even color on large surfaces.
How to erase Gundam markers
After using your Gundam markers, you will most likely overstep a boundary or two.
To erase a Gundam marker properly, use a Gundam eraser pen to mop it off.
To use your eraser pen more effectively, you can first pour out a small quantity of the solution into a pan. After pouring it in, use a cotton swab to apply the solution as needed.
This will make sure that you save yourself from staining the nib.
This method also saves you from the rookie mistake of releasing too much of the solution at once. This would lead to your paint running all over, which is a real mess.
Using a toothpick to erase Gundam markers
I prefer to use a toothpick to erase Gundam markers, make sure of two things;
1. Make sure it covers a small area,
2. Make sure it is completely dry.
This will save you from a bigger problem, trust me. Just scratch the mess from the edges and the stain should come off easily.
How to bring back your Gundam markers to life if they’ve dried out
As a hobbyist, your markers are a prized tool, and you must make sure to make the most of them.
To restore your Gundam markers, you will need a free cup, some warm water, and a napkin.
When you use your markers or expose them to air for more than 30 seconds, they begin to dry up. This is especially frequent in brush types.
If the marker becomes dry, it may be restored by first drawing out the nib with the nib pointing upward.
Because wriggling may easily destroy the nib, the nib should be withdrawn in a single motion. After rinsing with warm water for a few minutes, pat dry with a napkin.
The nib should be reinserted into the marker in the same way that it was withdrawn. To test the flow, press the nib on a napkin.
After this, your marker should be good as new.
Of course, to get the best out of your markers, cover them up immediately after you are done using them.
Never leave your marker exposed for more than 30 seconds.
Choosing the right size Gundam marker tip
Choosing the correct tip size for your Gundam marker is entirely dependent on your intended use and level of skill.
For beginners trying to panel line, pour-type tips will help you fill the panel lines with a consistent coat of paint.
However, pour types can be time-wasting to clean up.
A faster alternative to that is the fine tip of the liner type which allows rapid panel lining but is unsuitable for larger surfaces.
For touch-ups and a generally less glossy look, brush types are the best markers.
What does GM on a Gundam marker mean?
On any Gundam marker, there is an inscription GMXX where XX varies for different types of Gundam markers.
GM is just a prefix to the model number.
You can use this to identify exactly which marker you need based on its type and color.
Which Gundam Marker is most commonly used?
Custom sets of Gundam markers with different components can be purchased.
However, based on consumer demand, most sets of Gundam markers contain mainly Pour-type Gundam markers.
The single most commonly used marker is the GM301 marker, followed by the GM01 marker.
Conclusion
Different Gundam markers can be used for other things.
So, an important thing to note with your Gundam markers is that you have to know exactly what your aim is. If you match that with your level of skill, then you can choose the method of application that is best suited.