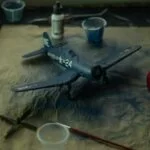
How to Use an Airbrush Without a Compressor (Super Easy Way)
Compressed air is a pretty big component of the airbrush because it helps you regulate the paint and air to get an even flow. Hence to achieve this, you’ll need a compressor.
Yet, the common question for many first-time airbrush users looking to cut down on cost is how can I use my airbrush without a compressor? Is that even possible? (YES!)
Is it possible to use an airbrush without a compressor?
The most significant role an airbrush plays when used for painting is called the atomization process.
This is a process that ensures paints with high pigment density are broken into smaller microparticles so the paint can come as thin coats on your kits. For this process to work, good airflow is essential, which we can also call compressed air or pressurized air, and for you to achieve good pressurized airflow, you need a device that can help create pressurized air.
This is why many people often use a compressor.
That brings us to the question, is it possible to use an airbrush without a compressor?
The simple answer is yes. What airbrushes really need is pressurized air. So, they won’t necessarily need a compressor to operate.
You’re probably wondering how possible it is to get pressurized air without a compressor. Well, you can use a CO2 tank.
Guide – How to use an airbrush without a compressor
*Keep in mind that an air compressor will provide you with the best results, and everything else will be a compromise. But, read this guide and you’ll be surprised how easy it is to use an airbrush without a compressor.
What you’ll need:
- Pump sprayer
- Scissors
- Bottled water cap (2)
- Small 17 to 35ml container with the lid on
- Metal ball pen
- Hobby knife
- Lollipop stick
- Marker
- Glue
- Nail
- Plastic
- Small silicon 1/4inch hose
To get started,
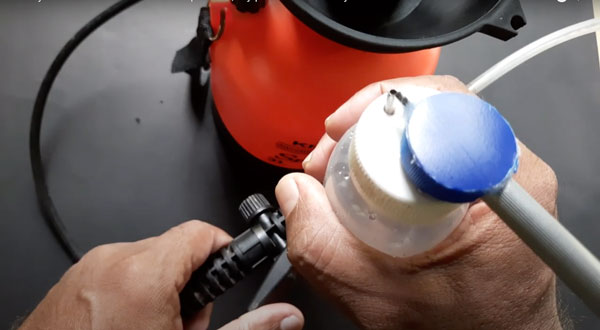
- Remove the ball and ink cartridge from the pen, so you’re left with its case opened on both sides.
- Separate the tip of the ink cartridge where the ink comes out from
- Pick the container with its lid on, and use a marker to create a small dot at the edge of the lid
- Use the sharp nail to make a hole over the small dot
- Position the longer part of the ink cartridge in the hole until it reaches the bottom of your container
- Use the hobby knife to cut two small rectangle-shaped parts around the screwing edges of your bottle water cap. These parts should be opposite each other.
- Make double tiny holes on the bottle water cap.
- Do the same on the lid of your container
- Glue what is left of the bottle water cap on the container and face opposite the ink cartridge.
- Make sure the cut parts are directly facing the ink cartridge in a straight line.
- Also, the tiny holes on the bottle water cap should directly sit on that formed on the container’s lid.
- Place the pen case horizontally in the hole formed on the bottle water cap so that the place housing the tip of the ink faces directly to the ink cartridge but sits above it. Then, use a metal ring to secure it and make sure the metal ring passes the two dots formed in the bottle water cap and into the container’s lid. Then tighten.
- Cover holes with adhesive glue so the air does not leak. Don’t forget to glue parts together so they don’t fall off when used.
- Draw a circle on plastic with another bottle water cap. Then cut it out and use it to cover the first one with the ink cartridge.
- Place the ink cartridge inside the silicon hose.
- Attach a pump sprayer like the Spray master sprayer to the silicon hose. It will help you build pressurized air with the pumping action of the sprayer.
Or, you can use compressed air cans
Compressed air cans, also called airbrush propellants, work as a replacement for a compressor.
A compressed air can is a small spray-like container that helps create pressurized air for airbrushing.
The only difference is that the compressed air can won’t work for long like a compressor. They typically last about 10 to 15 minutes. For this reason, they will work best on small projects.
Another down side that compressed air cans have is that you cant really regulate the air that comes out of the can, it will just come as a blast of air.
What makes compressed air can so desirable is you can make one yourself. Plus, they are compact and easy to transport. Hence, it is budget and mobility friendly. If you’re buying one, it costs less than $10.
Pros
- Cheap
- It does not make any noise
- Lightweight
- It does not require a moisture trap or filter like compressors
Cons
- Only last for 10 – 15 minutes
Conclusion
An air compressor is a vital component used to create pressurized air for airbrushing. But, it is something you can do without. All you need do is create a DIY compressed air can yourself or get one for less than $10 at a local hobby store near you.