How to remove mold lines from miniatures
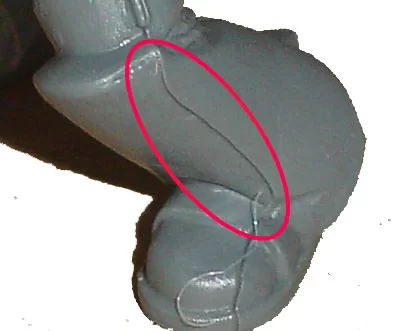
Mold lines are casting imperfections often left at the edge of miniatures after casting multiple parts together to form models.
The biggest drawback of this imperfection is that once painted, the mold lines become prominent and hinder the realistic effect of the paint. Hence, every mini painter needs to learn how to remove mold lines from miniatures before priming and painting their models.
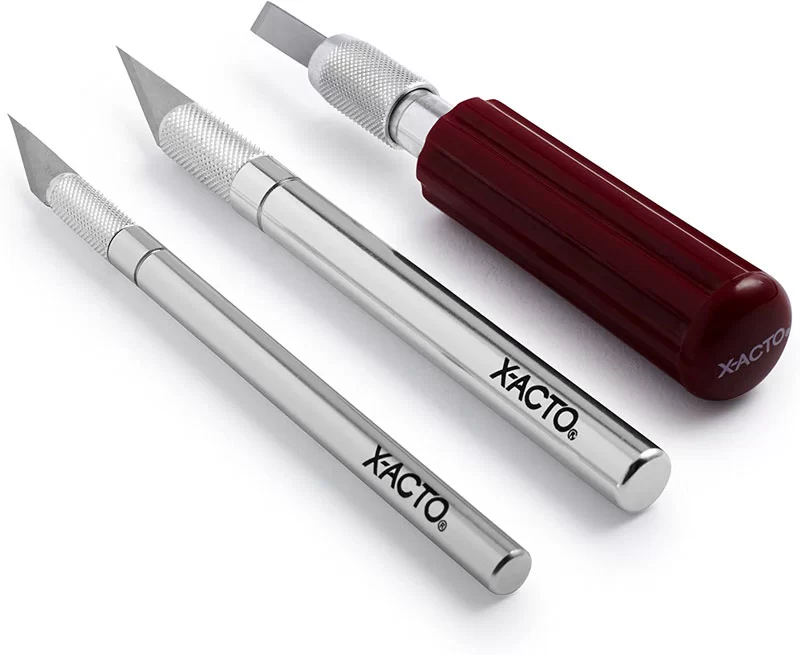
The Most common way: with your X-acto knife
60 painters out of 100 will use an X-acto knife to scrape or shave mold lines off their miniatures.
An X-acto knife is a sharp hobby-grade cutting tool with long, pointed blades that can reach tight corners. It is the most commonly used hobby-grade cutting tool for builders because they are often cheap and easy to access.
However, its build is completely different from the regular pocket knife or craft knife since it allows you to change the blade sizes.
To use an X-acto knife to remove mold lines from miniatures,
- Hold it 70 to 90 degrees to the surface as if you were going to cut straight into it but don’t cut into it.
- Then, draw the blade along the mold line with light pressure
- Don’t use the sharp end. Instead, use the back. It is tougher and won’t dig into the model.
- Sand the removed part for a smooth finish.
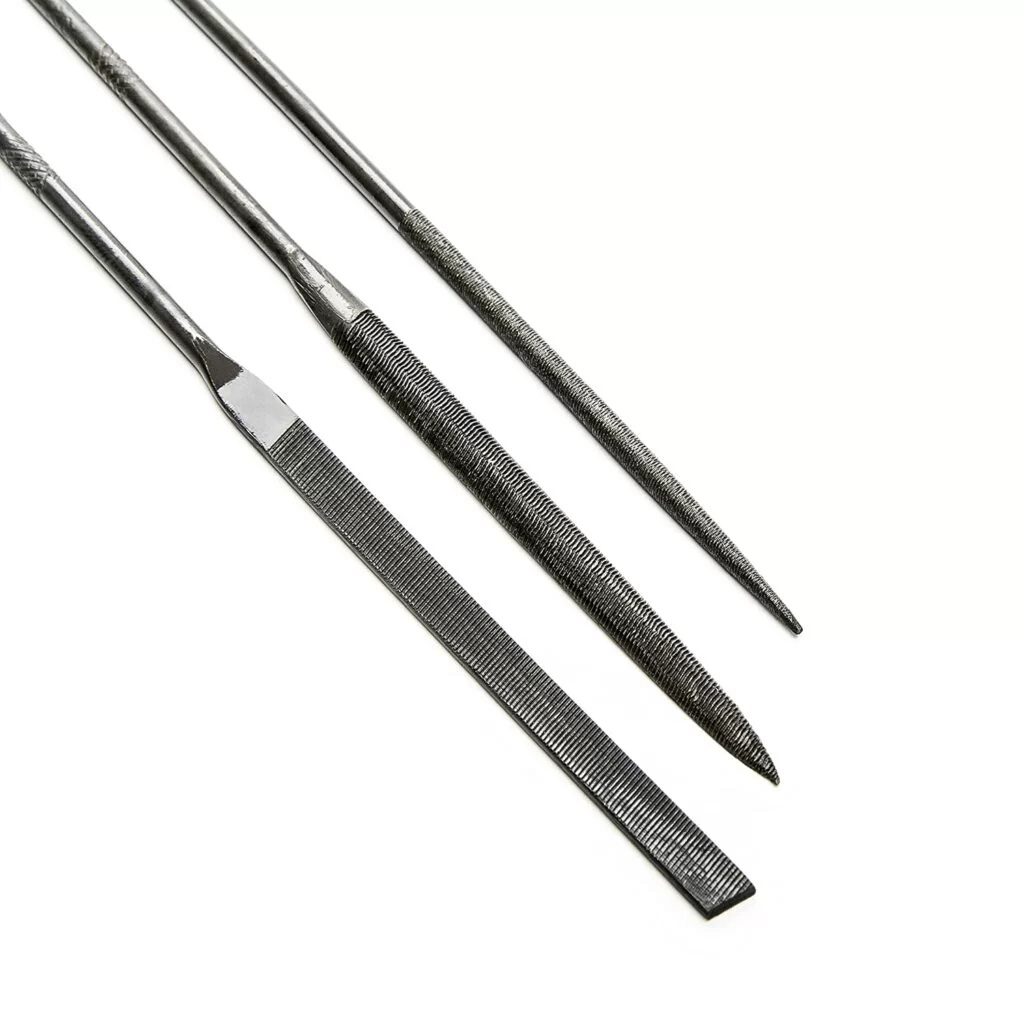
Average joe’s way: use a needle file to file mold lines
Rather than an X-acto knife, a more budget-friendly and easy-to-access tool that will help remove mold lines is a needle file.
The best part of this tool is that, unlike the X-Acto knife, where you need to be wary of digging into the miniature, you don’t have to be nearly as careful because you can’t gouge the surface of the model with a file.
Besides this, needle files come in different shapes and thicknesses, letting you quickly remove large areas of mould lines on miniatures.
To use a needle file to remove mold lines, do the following:
- Start at the base of the kit where the excess mold is
- Then, hold the slightly coarse side flat and brush it on the mold lines. The file wears down the mold slowly.
- Make sure to use light pressure, as excessive strain can cause damage
- Continue filing till you get all the mold lines out
- Wash after filing
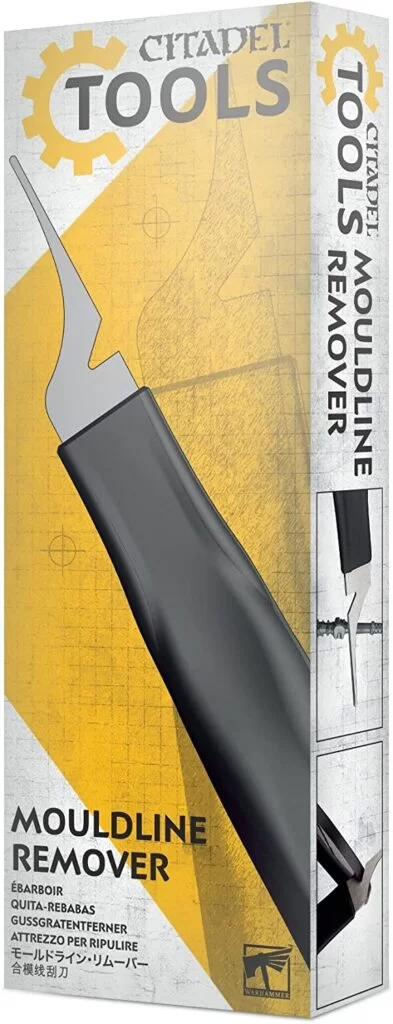
Most professional: mold line remover
A needle file and X-acto knife work well for removing mold lines on minis, but many professional builders prefer using a professional mold line remover.
This tool looks more like the X-acto knife but with a more pointed, curved, and sharp edge, but they make removing mold lines easy and safe.
Mould line removers also work great on plastic, resin, photo-etched parts, and even metal miniatures.
Just hold it like the X-acto knife but with your thumb acting
Use a mold line remover according to the following:
- Find a base to start from
- Place the metal part of the mold line remover on the edges with the mold line.
- Scrape off excess mold lines gently to avoid cutting delicate parts.
- Gently sand after using a mould line remover for an even surface.
- Wipe dust away with a rag. Then wash in warm water and soap mixture
If you are considering buying a mold line remover for your miniatures, some of the best include Citadel’s mold line remover, the army painter’s sculpting tools, or Vallejo’s mold line remover.
for the Most delicate result: sanding sticks
Sanding sticks are also a good way to remove mold lines from miniatures.
However, unlike others, they offer more delicate results due to their really thin and flexible form.
Just get sanding sticks in the 240 to 400 grit range and brush them where the mold lines run across large surfaces.
Their thin form means they can reach smaller areas that large tools like needle files and mold line remover can’t reach.

A scalpel, utility knife, or any other small and sharp knife will be good for removing mold lines
It’s also possible to remove mold lines from miniatures using a sharp scalpel, utility knife, or small sharp knife so long as you use the proper 70-90-degree hand placement technique.
So, when using a scalpel or utility knife,
- Be sure to angle it properly so you won’t accidentally cut into the plastic.
- Use your thumb as a brace for the part and scrap towards your thumb.
- Scrape three to four times (like when layering thin coats of paint) to get a clean scrapped line. If you do it right, you also won’t have to sand after scrapping.
Use a sanding paper
Entry-level builders will mostly struggle with using a file or hobby knife. A good way to make the process easy is to use sandpaper.
To use sandpaper to remove these lines off a miniature,
- Cut the sandpaper to desired grit (for super smooth results, get sheets up to 1200 grit
- Wrap it around something small and start brushing it on the mold lines
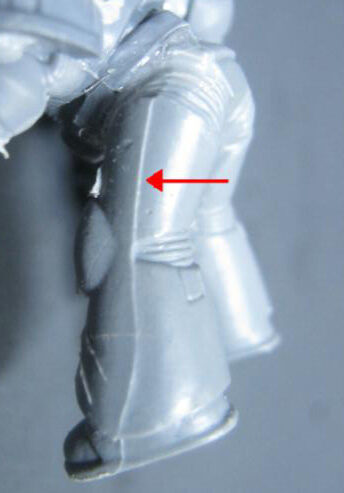
While he is using the sharp side of the knife (even though it is blunt), I prefer to use the back of the knife
Precautions when removing mold lines
Removing mold lines is important to get a perfectly detailed kit. However, the wrong technique could cause more harm than good.
Here are some precautions to take when removing mold lines from minis:
- While using hobby-grade knives, scalpels, or utility knives, avoid digging into the mini. It might leave gaps and make your model have accuracy issues.
- Position the cutting tool in an angled position rather than flattened to the surface. This way, you don’t scrap wrongly and cut up important parts.
- Always take time to check whether the details are still intact. This way, you keep the shape and details of the mini.
- While the aim is to remove mold lines, you don’t want to cut off the mold line. It might leave an even rougher surface, making the whole process time taking. Instead, scrape, fill or brush.
- When using a hobby knife to clean mold lines, don’t use the blade edge, but the back of the blade to scrape the mold lines off.
Sometimes, some mold lines are best filled
If you’ve ever had a model with fitment issues, especially on its edges or other delicate parts, you know how frustrating it can be to scrap off more mold lines to get perfect details. Then again, you might be compromising on accuracy by scrapping mold lines.
In a case where mold lines run deep and will likely compromise the small details on your kit that makes them look real, you want to get a gap filler, putty, or cement to cover these gaps.
A gap filler melts, making it easy to bridge the gap between realism and accuracy. When used on the mini, a gap filler will melt effortlessly into open gaps, from mold lines to fill empty spaces.
Remember to wash your mini after removing mold lines
The biggest mistake many painters and builders make is getting straight into painting or building their models before cleaning them.
What many new painters don’t know is that it will be much easier to paint the mini well when washed after removing mold lines.
Washing the miniature after scrapping the mold line has its advantages. The most prominent being that the paints stick well and the details after painting the minis are perfect like the real thing.
Paints won’t adhere well to a surface with mold release, and a miniature used straight out of the box after removing molds has lots of this. So, not washing the mini means the paint will chip easily, won’t last long, and even look bad during the painting process.
On the other hand, the dust left from scrapping molds will remain on the miniature. This makes getting smooth details hard.
After removing mold lines, be sure to brush and wash your small figures to allow the paint to stick well, last long, and give a display-worthy finish.
Extra tip: removing mold lines from metal miniatures
While plastic miniatures often fall victim to mold lines, metal miniatures are no exception.
Metals also pass through the casting process same ways as plastic minis. So, out of the box, they always spot some form of mold lines that causes accuracy and painting issues.
On the other hand, the biggest drawback of removing mold lines from metal miniatures is that, unlike how easy removing mold lines from plastic is, metals take more than plastic.
Their steel surface means you will spend them scrapping off the tiny imperfections on the model, so they don’t mistakenly scratch and leave more imperfections.
If you have a steel legion officer, a needle file can make filing down mold lines easy, but the X-acto knife can do most of the work. Plus, they fit into creases easier than a file.
Final thoughts
To remove mold lines on your minis, choose between the X-acto knife, needle file, mold line remover, sandpaper, standing stick, or scalpel. If you are looking to do pristine work then you should use a knife to remove the mold lines and then sand the surface.
You don’t want to compromise the fitment and accuracy of your miniature or model due to mold line imperfections.